Bulk Remove Category or Tag Assignments
If an app has support for categories or tags, then you could already bulk assign categories or tags to an app item. There have been three options for bulk assigning:
- Assign the newly selected categories or tags to the app item.
- Replace existing categories or tags with the selected ones.
- Remove all categories.
There is now a fourth option.
Now you can remove one or more selected categories or tags.
This allows you to select one or more app items and in one step remove one or more category assignments.
Here is how you can use this. We'll use Categories as an example (tags have a nearly identical flow).
- Go to your app and view the app items (like Blog Posts or Store Products).
- Click the checkbox next to one or more app items.
- At the top of the table, click the "Assign" button, then "Assign Categories".
- On the next page, select the "Remove the selected categories and keep other category assignments" option.
- Select the category or categories to remove.
- Click the "Save Category Assignment" button in the upper right.
Replace Images and Files When Uploading
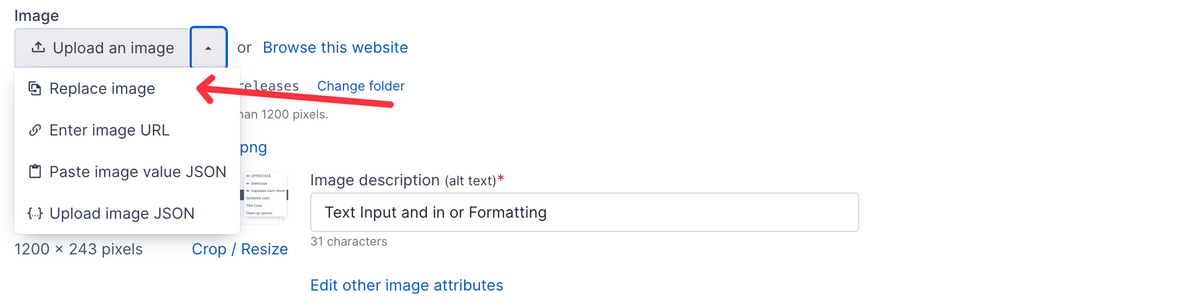
Historically, if you wanted to replace an existing image, you had to first go into the File Browser and delete the image. Then upload the new image.
Same process for replacing files. (Below talks about images - the file upload field has the same functionality.)
Now, there are two ways to replace an existing image.
First, you can click the menu icon next to the upload button and select "Replace image".
This will do a few things:
- The file upload will be restricted to the same file type as the existing image. For example, if it's a JPG image, then you'll only be able to upload JPG images.
- The new image will be renamed to the same file name as the existing image.
- The existing image will be cleared from the CDN automatically so that pages get the new image.
The other way to replace an image or file is to upload a new one with the exact same name. If that happens, you'll be prompted to confirm that you want to replace the file before the image is uploaded.
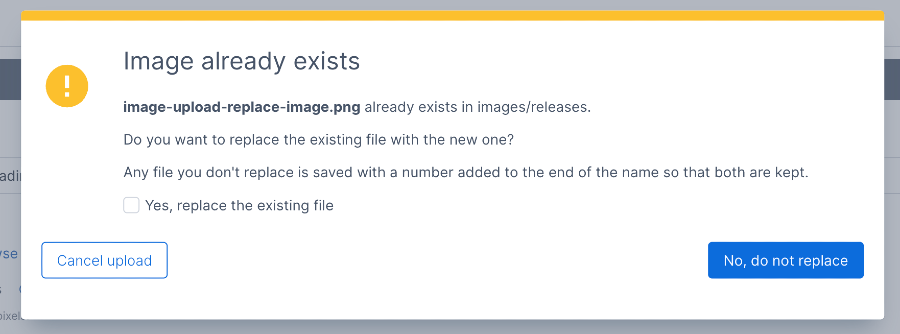
Three things can happen here.
- Click the "Cancel upload" button to cancel uploading and select a different file.
- Click the "No, do not replace" button to upload the new image, but have the system prefix a number to the end to keep it separate from the existing image.
- Click the "Yes, replace the existing file" checkbox, then click the button on the bottom right. (It'll change to "Replace existing file" and turn red). This will replace the image just like described above.
Hopefully this streamlines your workflow a little bit.
Copying content improvements
We have improved copying app items and other content. Previously, the system would have copied the item behind the scenes and then taken you to the "edit" form.
Now, copying is essentially like adding a new app item, but with the form filled in. Using blog posts as an example, when you copy a blog post a new form will show in a modal and be filled in with the content from the post that you're copying. You can then make any changes and save the new post.
You can also copy app items from two or three spots, depending on the app.
- From the list of app items, click the "three-vertical dots button" and then "Copy".
- From the "Edit" form, click on the "Actions" menu button and then on "Copy".
- If the app has a detail page (like Collection Widgets), then you can copy from there too.
Almost all apps now have extensive copy functionality.
We hope that this gives more flexibility and streamlines copying.
Redirects are now part of the new administration
Migrated the Redirects app to the new administration. It's now found under the Settings menu instead of Site Manager.
Added support in the file browser for removing a file from the CDN
Added support in the file browser for removing a file from the CDN. When a file is deleted or updated, it's removed from the CDN. This new feature helps in rare cases when the file still exists in the CDN.
To use this, click on the file in the browser. In the right-side panel, click the menu button next to the view/download link.
Text input fields now have a format option to them
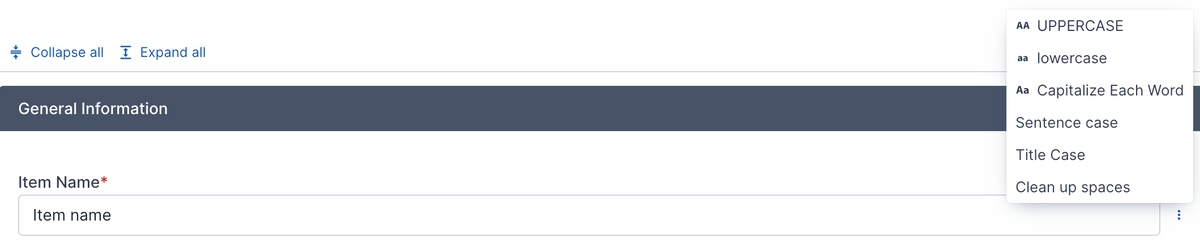
Text input fields now have a format option to them. When you hover over a text input field or click into it, a menu button shows after the field. Click the button and options to format the text show. You can do the following:
- UPPERCASE: Convert all letters to uppercase.
- lowercase: Convert all letters to lowercase.
- Capitalize Each Word: Make sure that the first letter in each word is capitalized. Other letters are lowercased.
- Sentence case: Capitalize the first letter in each sentence (or the start of the text) and lowercase everything else.
- Title Case: Capitalize the first letter of each word except for small words like "is", "and, "in", "or".
- Clean up spaces: Remove any spaces before or after the text and redundant spaces between words.
Importing themes and editor accessibility improvements
- Added support for importing theme data.
- Added a context menu to the editor for images and links.
- Added support for setting the "aria-label" attribute on navigation items.
- Added accessibility capabilities to the editor:
- Added support for setting the "role" attribute on tables.
- Added support for setting the "lang" attribute on elements.
Improvements when adding or editing images in the rich text editor
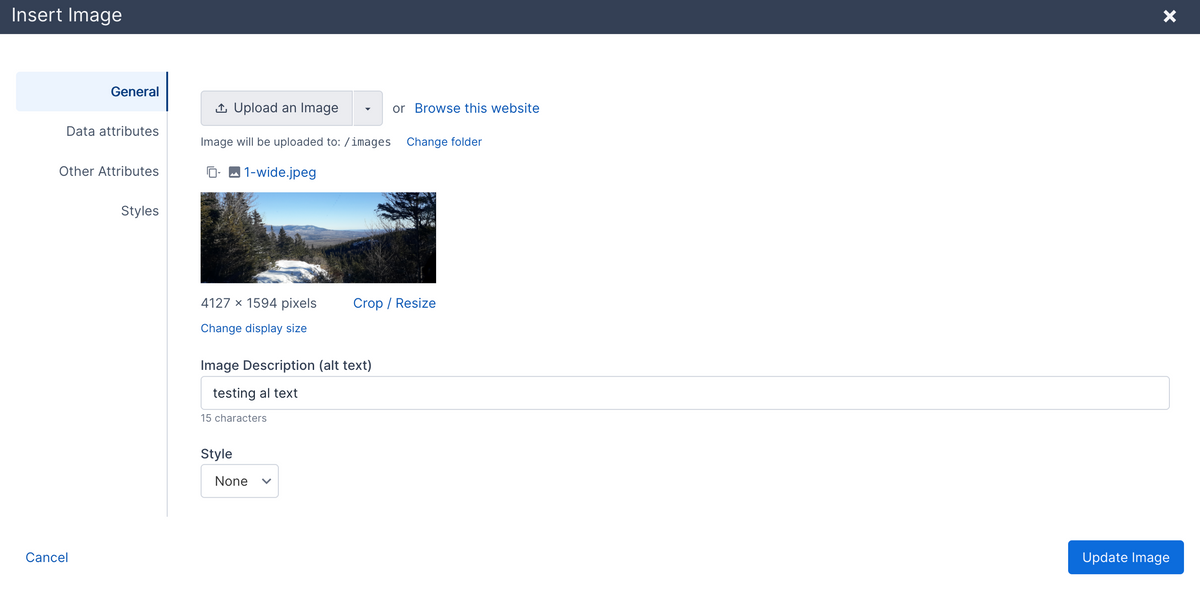
Similar to the link updates in the rich text editor, we also improved the image modal for adding or editing images in the editor.
- You can now change the display size without resizing the image. While we advise resizing the image, this can be useful when you just need to display the image a little smaller.
- The alt text field now shows the number of characters.
- Set custom data attributes on an image.
- Set the title, class, and id attributes.
- Set the image alignment and padding.
- Improved the user interface for setting the margin, border, border radius, and box shadow styles by using specialized fields for those types of styles.
Improvements when adding or editing links in the rich text editor
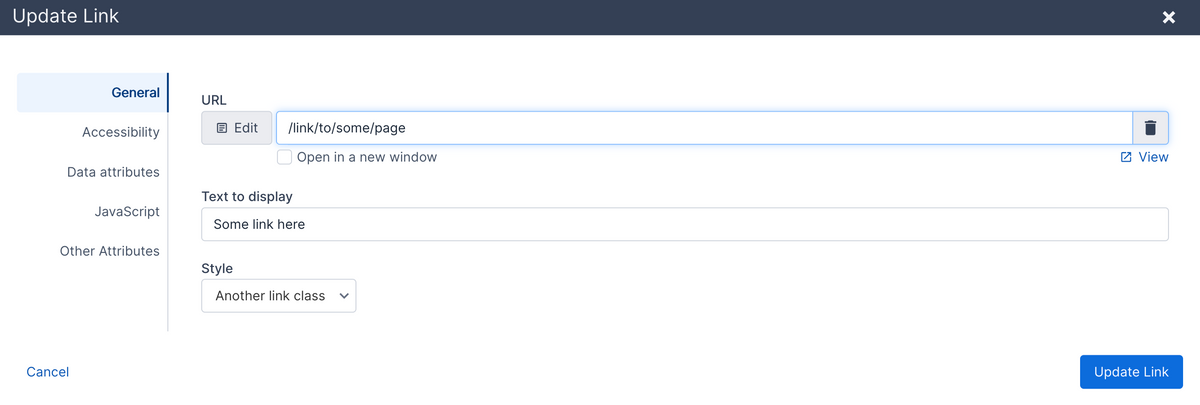
We updated the rich text editor link modal to add more capabilities when you add or edit links.
You can now set more link tag attributes without having to view the source code in the editor.
- Accessibility values such as title, aria-label, and type.
- Add custom data attributes. These are sometimes used for analytics tracking or behavior hooks for JavaScript.
- Set the onclick JavaScript attribute value.
- Set the id, class, and hreflang (language) attributes.
We also add some help text if you try to use link text that is not ideal, such as "click here", "click" or "learn more".
More support for importing and exporting content as JSON
Added support for exporting and importing more content as JSON.
- Content areas can now be exported and imported.
- Navigation menus can now be exported and imported.
- Content layouts and content layout fields can now be exported and imported.