Storage app payment information updates
We added a few updates to the Storage app regarding payment information.
- When bulk processing invoices, it will now show you why a customer was not included in the list.
- Anywhere customers are show in tables (like the customer table, invoices, or subscriptions) the table will now include information about the primary payment method the customer has. This makes it easier to see if a customer has a payment method on file.
- Invoice tables now show the status of the subscription that the invoice is for. You can also filter by the subscription status.
Breadcrumbs now have their own Twig template file
This is a small improvement, but one that will help developers. The breadcrumb template has historically only been saved in the website database, but now it is also saved as a Twig template file. This means that you can track it in GIT with the rest of your templates. It gets saved to "site/breadcrumb.twig" within your theme templates folder.
Modals are now draggable and resizable
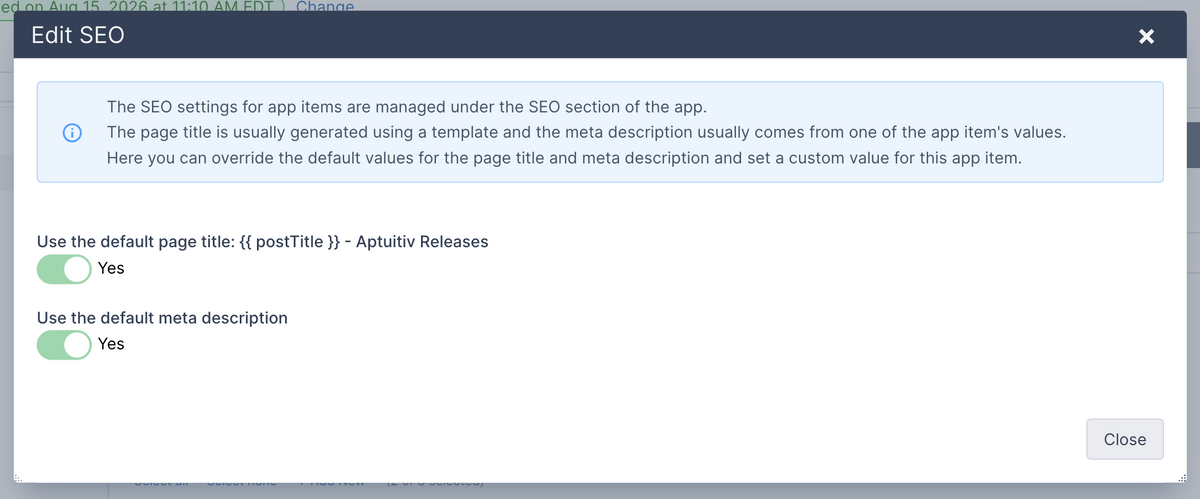
Modals, also knows as "pop ups" are used a lot in our CMS software for showing additional fields and content to update. Previously they displayed centered on the page and you couldn't change that.
Now you can drag modals around on the page by clicking the dark title bar at the top and moving your mouse around. (You can also hold down Option+Shift and use the arrows to move it around.) If the same modal is reopened then it will remember it's last position.
You can also resize modals by dragging on the left, right or bottom edges. Or drag from the bottom-right or bottom-left corners.
This is a small update, but really useful if the modal is covering up something you need to reference while working in the modal.
App item URLs in the app item table
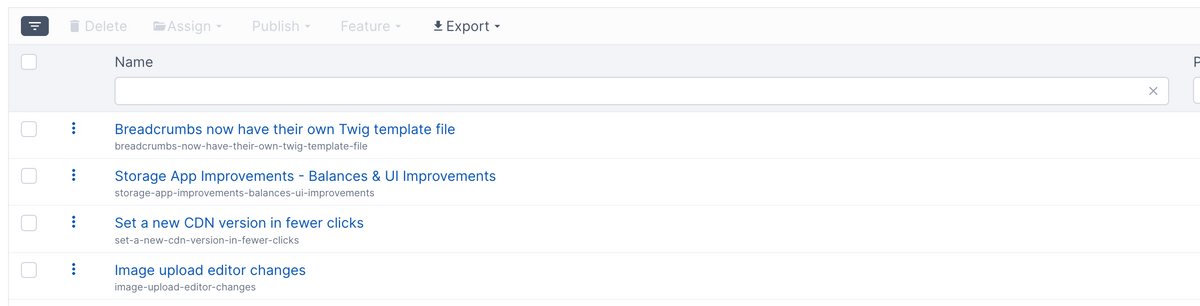
The Pages app has shown the URL of the page below the page name for a while. Now all app items do too.
This is useful in a few ways including:
- Easily see what the URL is for the item in case you need to change it.
- You can now filter the table by the item URL to find specific items. Useful for finding an item to update when doing an SEO or accessibility audit.
Storage App Improvements - Balances & UI Improvements
Multiple improvements to the Storage app in this release.
Fixed calculating the initial rent period
Fixed an issue with calculating the correct number of initial months to rent when it's more than 1 month. We allow setting an initial rental period to be more than one month, and sometimes the initial rent period wasn't calculated correctly. Now it is.
New setting to force renting whole units of the initial rent period
To help ensure the ideal initial rental period, we added a new setting called "Should the initial rent period be rounded up to the nearest whole number of periods?".
If that's set to "Yes", then the initial rent period will always be at least 1 month, 2 months, 3 months - whatever the initial rent period is configured to. This allows the initial rent period to always be a minimum of the configured rent period, or prorated so it's close.
If a storage company has an initial rental period of 1 month, they likely want this off so that someone renting in the beginning of a month isn't charged almost two months. But if you've configured the initial rental period to be more than 1 month, you likely want to turn this on because you likely want the initial period to be at least 2, 3, or whatever number of months you picked. If it's turned on then it'll be the number of months + a prorated amount for the remainder of the current month.
Rental settings now show a preview of the initial rental period
To help make sure your initial rental period is calculated correctly, there is now a "Preview of initial rental periods" accordion that you can toggle to show a preview of what the renewal date would be for rents starting each day of the current month.
Invoice balances now include late fees
To help you see what is owed, any time you see a balance for an invoice, it will include any late fees. All of the different detail pages are updated, as well as the payment form and the form to apply a manual payment.
The customer detail page also shows a total open balance for the customer if they have one.
The "Record payment" form now supports recording late fee payments. Previously, it only showed the open balance for the invoice. Now it includes late fees too.
Updates to adding a payment method
The form for adding a payment method for a customer has been updated to use the latest code from Stripe. This updates the user interface a little bit and hides Stripe Link from showing.
Transactions now show more payment information
Transactions now show more information about how a payment was made (like the credit card type and last 4 digits) and link to the transaction in Stripe. The Stripe link is useful if you need to do any troubleshooting or need to refund. (We have refunds planned as a later update.)
Customer detail tabs now have action buttons
Each tab on the customer detail page now has an "Add" button to add the thing the tab is about. (Transactions are the exception because they are added by the system when a payment is made or attempted.) While the same actions could be done in the "Actions" button menu in the top right, this puts the "Add" action in more context in the tab.
Set a new CDN version in fewer clicks
In the past, if you needed to reset the CDN so that changes to files would apply, you had to turn the CDN off and then turn it back on.
Now, if you just need to reset the version number, you can do it without turning the CDN off.
Click the "Actions" button in the top right of the CDN page and then click "Set new CDN version value". That will set a new version number and clear the site cache.
Image upload editor changes
Historically, all image upload fields showed an image editor after you selected a file. However, most of the time, you just want to upload the selected file, and this was an extra, unnecessary step. You can edit an uploaded image after the fact, and that will also update the image in the CDN.
Now, by default, image upload fields won't show the image editor. The exception is images in the rich text editor. We felt that it would be best to show the editor there because that's one spot where images probably should be resized before uploading.
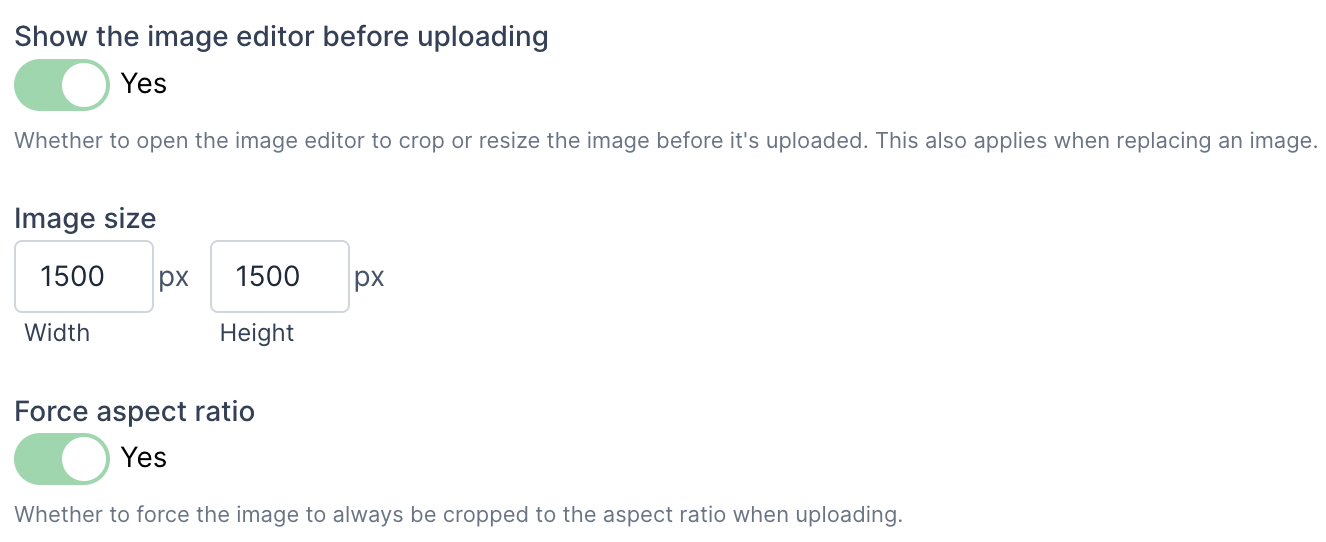
If, however, you want an image upload field to show the editor by default, there are two ways to do that.
1) There is a new "Show the image editor before uploading" field. Toggle this to "Yes" to always show the editor when uploading.
2) If you set the image size and then turn on the "Force aspect ratio" field, the image editor will always show. This is because the editor is used to crop the image if necessary to fit the aspect ratio.
Directory App Migration to New Admin
We have finished migrating the Directory app to the new administration. This also included some additional improvements.
- Profiles now have a new Phone field that lets you capture the phone type, phone number, and extension in one field. The phone number can also have optional formatting.
- We added support for Tags in the Directory app. This gives another level of organization.
Page Attributes for Custom Page Data
Most of the time, the existing fields for Pages, Blocks, or Content Layouts give you what you need to build the content for your pages and display your pages.
But once in a while, you may need something more custom. An example could include changing the logo in the header for specific pages or maybe changing a button in another template.
The solution to this is the new Custom Page Attributes functionality. For developers, this is similar to attributes on app items.
The attributes will show up last in the list of content to edit for a page. They can be organized by Attribute Groups. The default Attribute Group is called "Attribute Groups". You can rename it or add new ones if you want.
To use this, go to Content -> Page Settings. Then click on "Attributes".
There you can add new attribute fields.
When you edit a page the fields will show below the other fields for the page content.
To use in your templates, you'll use the new {{ _page.attributes }} variable. (You can also use the shorter {{ _page.attr }} if you want.) If your variable is called "Logo" then you'll access it like this:
{{ _page.attributes.logo }} or {{ _page.attr.logo }}.
The power behind this is that the _page variables are global, so they can be used in any template that is used to display the page.
New Options for Category and Tag Fields
When assigning categories or tags to app items, you can now add a new category or tag. Click the "Add New" button below the field label and a modal will open where you can add the category or tag.

After it's added, the new category or tag will show at the bottom of the list and be automatically selected. If you assign the category to a parent category, then it will show under the current parent category.
Other new features with these fields include:
- Click the checkbox icon (second one from the left) to filter the list of categories or tags and only show the selected ones. This is useful when you have a large list and you need to easily see what's already selected.
- The toolbar now shows the number of categories or tags selected.
- If the category list has any subcategories, then they show as collapsible items. You can expand or collapse all of them. By default, they are all expanded.