Replace Images and Files When Uploading
July 28, 2026

Historically, if you wanted to replace an existing image, you had to first go into the File Browser and delete the image. Then upload the new image.
Same process for replacing files. (Below talks about images - the file upload field has the same functionality.)
Now, there are two ways to replace an existing image.
First, you can click the menu icon next to the upload button and select "Replace image".
This will do a few things:
- The file upload will be restricted to the same file type as the existing image. For example, if it's a JPG image, then you'll only be able to upload JPG images.
- The new image will be renamed to the same file name as the existing image.
- The existing image will be cleared from the CDN automatically so that pages get the new image.
The other way to replace an image or file is to upload a new one with the exact same name. If that happens, you'll be prompted to confirm that you want to replace the file before the image is uploaded.
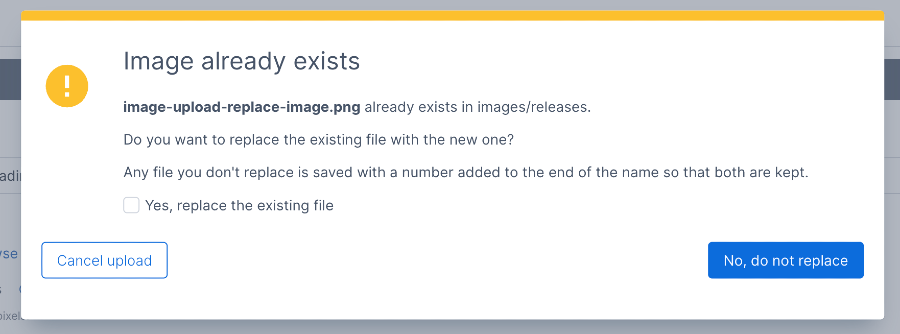
Three things can happen here.
- Click the "Cancel upload" button to cancel uploading and select a different file.
- Click the "No, do not replace" button to upload the new image, but have the system prefix a number to the end to keep it separate from the existing image.
- Click the "Yes, replace the existing file" checkbox, then click the button on the bottom right. (It'll change to "Replace existing file" and turn red). This will replace the image just like described above.
Hopefully this streamlines your workflow a little bit.