Manage navigation menus
The navigation for your website is organized in Navigation Menus. Each navigation menu contains one or more navigation items. The navigation items are the actual links in the navigation menu.
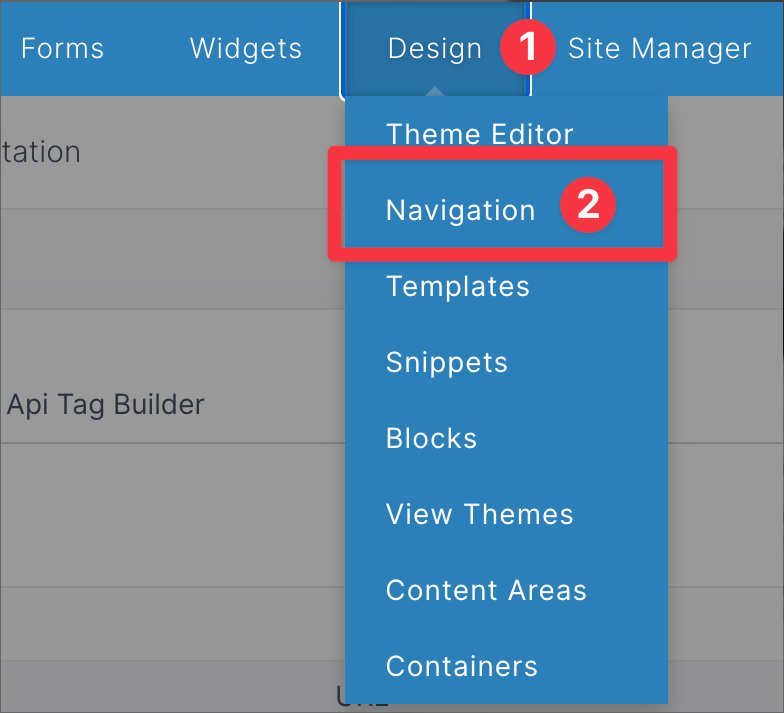
To manage navigation menus and their items, click Design in the top bar in the administration, then select Navigation.
Viewing navigation menus
The main navigation page will show a list of navigation menus.

Click the navigation menu to edit it or view its items.

You can check one or more navigation menus, then click the "Delete" button to delete the selected menu and its items.
Click the Template name to view the template code that the menu is using.
Click the three vertical dots next to the menu for some additional options. This menu is a shortcut to
- Edit the navigation menu
- Add an item to the menu
- Delete the menu

Click the "Add Navigation Menu" button in the upper right to add a new navigation menu.

Menu details
After clicking a navigation menu, you will be taken to the menu detail page.
There are four tabs across the top of the page to organize the menu data.

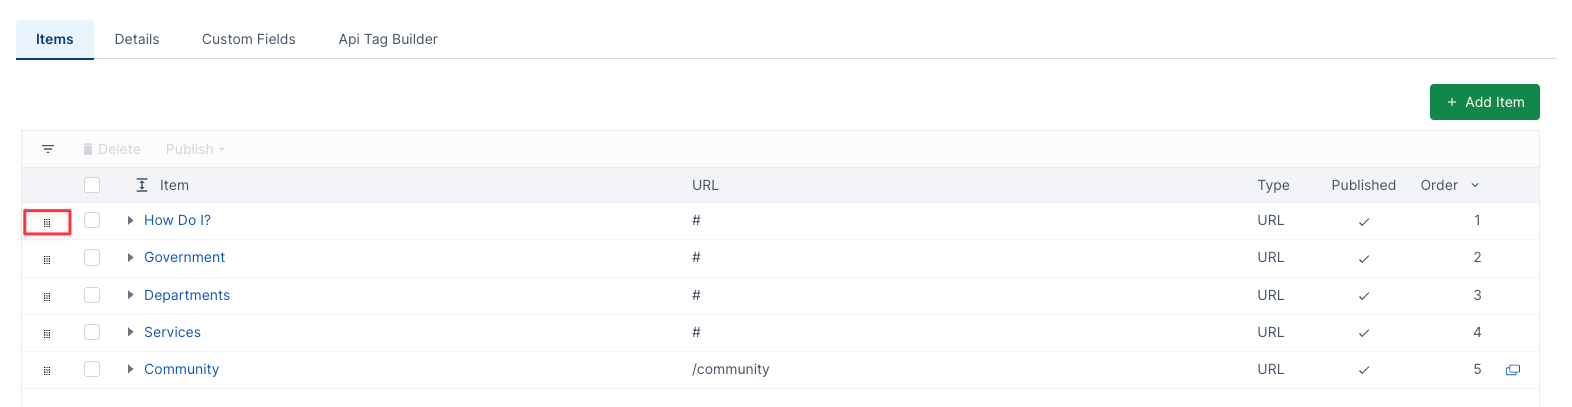
Items tab
The Items Tab is where you can edit, add, and organize Navigation Menu Items.
You can reorder and organize the Items by either clicking and dragging on the dotted column outlined in red below, or by clicking and dragging on the whole item.
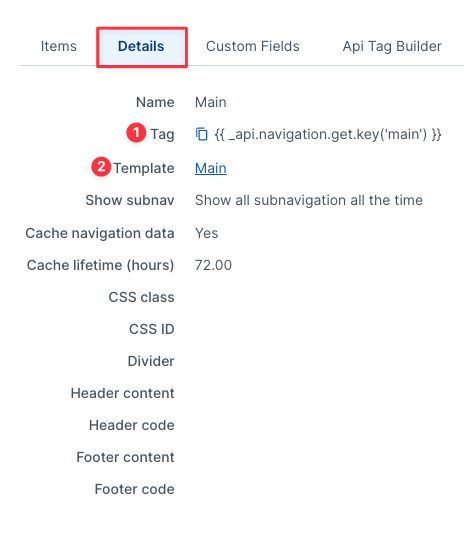
Details tab
The Details tab shows the information that has been saved for the navigation menu.
- Name: The navigation menu name
- Tag: (1) This is the template tag to display the navigation menu on your website pages. It goes in a template where you want the navigation menu to show. You can click on the "copy" icon next to it to copy it to your clipboard.
- Template: (2) The name of the navigation template that the menu is configured to use. You can click on the template link to go directly to the template code that this menu uses. (Note that you can customize the template tag to use a different navigation template. Consider this template the default template that the menu will use.)
- Show subnav: How sub navigation is displayed by default for the menu.
- Cache navigation data: Whether the navigation menu data will be cached once it's initially retrieved and processed. This helps with performance.
- Cache lifetime (hours): The number of hours that the navigation menu data is cached.
- CSS class: The CSS class that the menu is configured to use. This is typically output in the ul tag for the menu in the navigation template. Instead of setting it on the menu, you can also set it in the navigation menu template code.
- CSS ID: The CSS ID that the menu is configured to use. This is typically output in the ul tag for the menu in the navigation template. Instead of setting it on the menu, you can also set it in the navigation menu template code.
- Divider: A string of text or HTML code that will be placed between each navigation menu item. This value is accessible in the navigation templates.
- Header content: Editor content that can show above the navigation menu.
- Header code: HTML code that can be used to show content above the navigation menu.
- Footer content: Editor content that can show below the navigation menu.
- Footer code: HTML code that can be used to show content below the navigation menu.
Custom Fields tab
You can add custom fields that can be used when adding and editing menu items. They are useful when you need some additional logic to display a navigation menu.
For example, you can use them to set whether a navigation item should show as a mega menu instead of a regular dropdown menu.
The custom fields are unique to the navigation menu and are not shared with other navigation menus.
If you add any custom fields, they will show at the bottom of the "General" tab when adding or editing navigation menu items.
Click on the (1) "Add Custom Field" button to add a new field.
Click on an existing field to edit it.

Here is an example of Custom Fields -

API Tag Builder tab
The API Tag Builder tab contains API tag builders for four different navigation APIs.
This is a tool that allows you to configure the parameters that you need for the different navigation menu API tags.
Click the tab for the API tag that you need, fill in the form, and copy the API Tag value at the bottom. (You can click the "copy" icon next to the tag to copy it to your clipboard.)
